Questions
Frequently Asked
We recommend that you go ahead and wash and rinse your new Mazama reservoir before using it for the first time. While all Mazama reservoirs are assembled in a cleanroom environment using virgin materials, it’s good practice to clean it before use.
Mazama reservoirs are easy to clean and care for, just follow our reservoir cleaning steps here: How to clean your Hydration Bladder?
If you're using your bladder regularly (more than once a week), we recommend that you look at replacing your bladder after 3 years of use. Check your reservoir's seams and connections for wear and tear. If your bladder is discolored or spots that just don't clean up, it's time to consider replacing it with a new one.
Mazama products are covered by our Lifetime Guarantee for material and workmanship defects. If your bladder has been damaged in some other way, please contact us and we'll do our best to assist you.
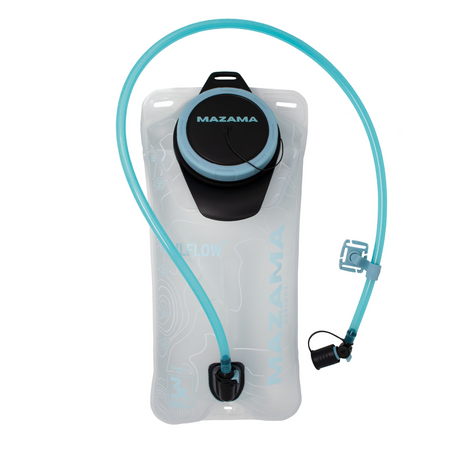
For the bladder film, Mazama uses a USA-made film that comes from the medical device industry. The metallocene film in Mazama reservoirs is a super strong version of the polyethylene used in your sandwich bag. The other water contacting materials include polyurethane for the tube, polyethylene for the fittings, and silicone for the bite valve sheath. Our film and other bladder components have all been tested and meet FDA and European Union food contact requirements as well as California Proposition 65 standards.
Taste is subjective and the quality of drinking water differs from place-to-place, but in general our polyethylene-based film is going to impart less plastic taste than bladders made with thermoplastic polyurethane (TPU).
View Independent Test Results
If you’ve got a brand new Mazama bladder that is too plasticky for your taste, try rinsing it with a diluted mixture of lemon juice and water to neutralize any residual plastic flavor. We’ve found that after a few uses of a new Mazama bladder, even water that has sat in the reservoir for hours at a time, remains relatively taste-free.
You can reduce sloshing by making sure that there is no air pocket left in the bladder during fill up. The easiest way to do this is simply overfill your bladder and have the water spill out as you seal it up. Alternately, you can fill to your desired level, squeeze the bladder until the water level is even with the top of the closure port, then while continuing to apply pressure, quickly seal the bladder. With no air pocket the water in the bladder is better contained and won’t slosh around within the reservoir.
Yes. If you are pre-chilling your bladder, it’s best to fill the reservoir a little bit below capacity to allow for some expansion. To keep the closure ice free set the bladder in an angle within the freezer so that the closure portion of the bladder is above the water level. Some people also store their empty bladder in the freezer to prevent mold growth.
Mazama reservoirs are dishwasher safe, but we recommend that you hand wash your reservoir. Our bladders are not designed to be turned inside out, so dishwasher cleaning may not fully clean the inside of the reservoir.
Mazama’s drink tube magnet system is incredibly handy for quick access to fluid on the move. For optimum performance, you can set up the drink tube and magnet base so that the bite valve naturally finds the magnet base on its own. To start, choose which side, left or right you will be routing your drink tube. Place the magnet retainer on the selected shoulder strap just below the chest strap connection. If you don't have webbing loops for the magnet on your shoulder strap, place the magnet base on the sternum strap close to where it meets the shoulder strap. Now you will want to cut your drink tube so that it’s just the right length to land on the magnet base. First, disconnect the bite valve from the drink tube by pulling its barb connector off the drink tube. Now drape the drink tube over your shoulder and mark the location on the drink tube where it passes over the magnet retainer. Cut the drink tube at this location. It’s best to start with a slightly long drink tube and cut again as needed. Re-attach the bite valve to the tubing end and rotate the valve with the drink tube so that the bite valve magnet and retainer base magnet are roughly parallel to eachother. When this is set-up correctly you should be able drop the bite valve out of your mouth and have it find the magnet base on its own.