Keeping your fresh and avoid the funk
October 14 2024 – Willy-Joe Williams

If you've used a hydration bladder, you know that keeping it clean is essential. With regular use, a hydration pack can pick up mold, odors, and unwanted tastes, especially if you occasionally use flavored drinks. In this guide, we’ll show you the best ways to clean your hydration bladder, from specialized tools to easy DIY hacks. Plus, we’ll cover a storage hack to help keep your water reservoir fresh and bacteria-free.
Essential Cleaning Tools
Cleaning your hydration bladder is easier with a few essential tools designed specifically for this purpose:
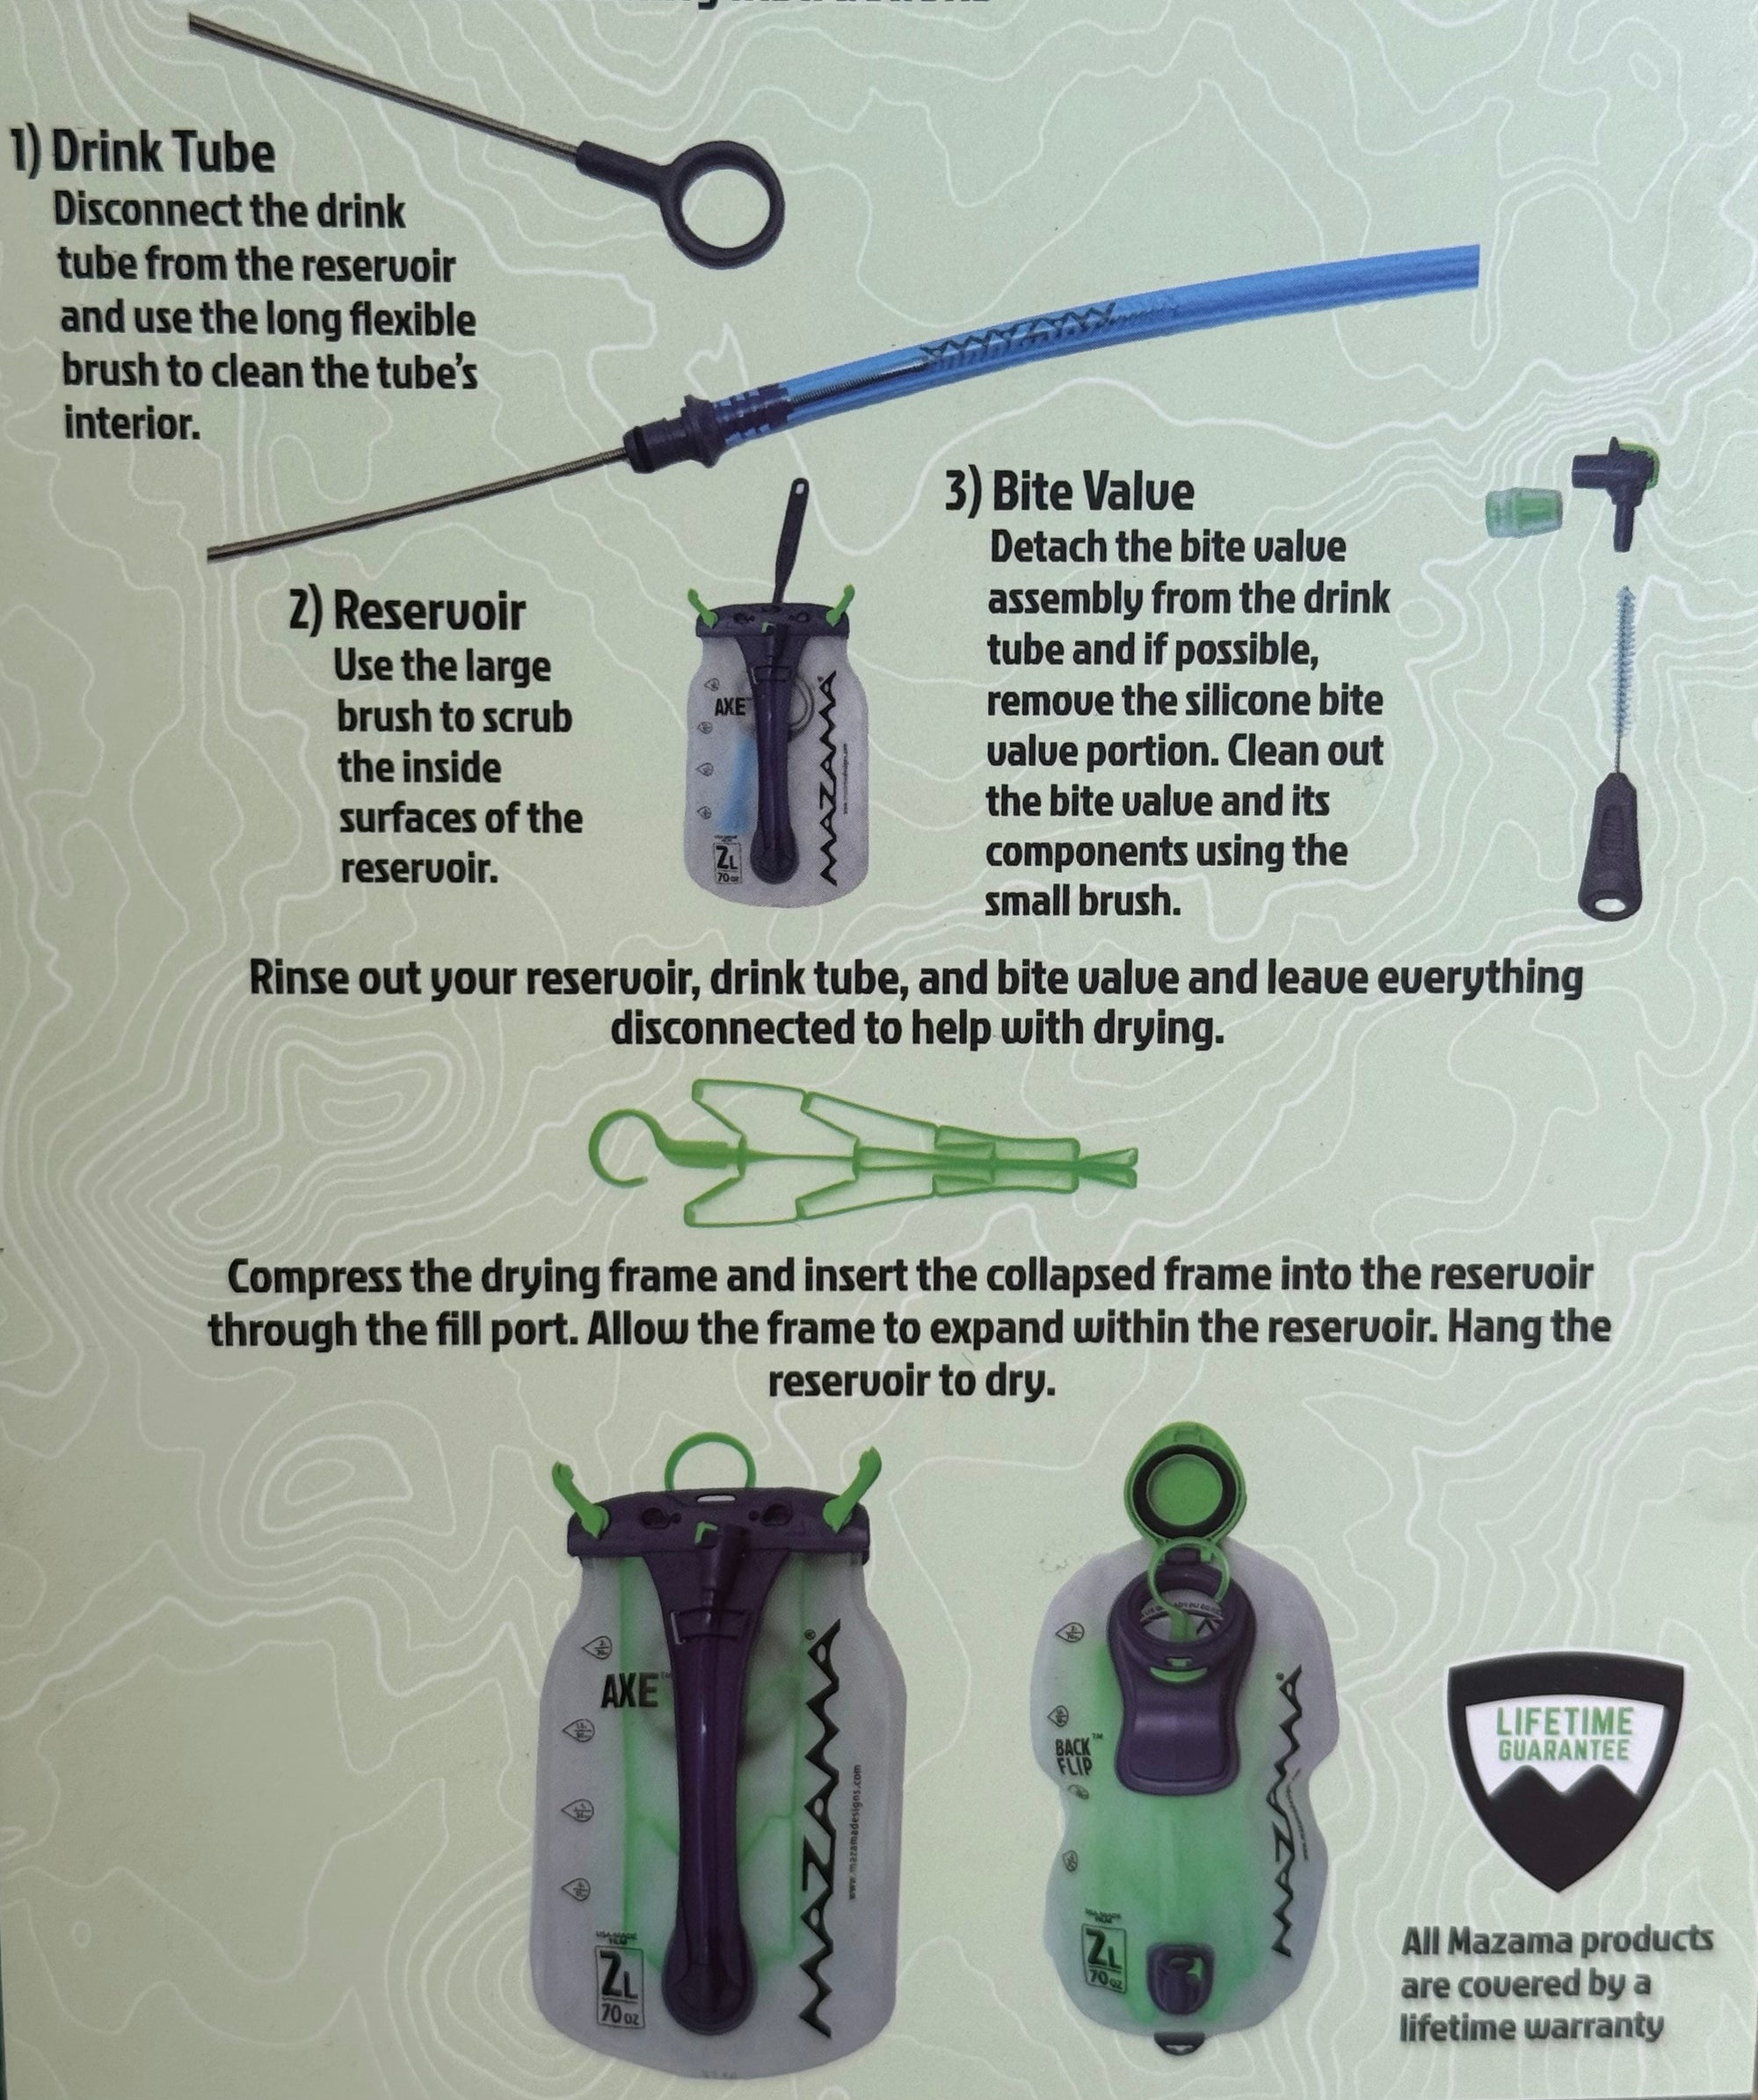
- Tube Cleaning Brush: This flexible brush is one of the best ways to clean out the hose of your hydration pack, preventing mold from building up in the tube.
- Small Brush for the Bite Valve: Cleaning the bite valve can be tricky, but this tool gets into hard-to-reach spots, keeping bacteria and residue out.
- Drying Rack or Hanger: After you clean your water bladder, it’s essential to let it dry completely to prevent mold and mildew. A drying rack helps airflow reach all parts, ensuring a mold-free hydration system.
DIY Cleaning Hacks for Your Hydration Bladder
No special tools? No problem! Here are a few DIY hydration bladder cleaning hacks to keep your water reservoir odor-free and bacteria-free.
- Vinegar and Baking Soda: Mix warm water with a tablespoon of baking soda, fill the bladder, and shake. Follow with a rinse using vinegar, which helps eliminate any lingering odors.
- Lemon Juice: Lemon juice is a natural deodorizer, perfect for cleaning the bite valve and hose. It leaves a fresh scent and keeps your water tasting clean.
- DIY Drying Hack: If you don’t have a drying rack, try this: use a clean spatula to prop open the bladder, or hang it upside down with a coat hanger to allow airflow. This keeps your hydration pack free from moisture that can lead to mold.
Freezer Storage Hack to Keep Your Hydration Bladder Sterile
A simple way to keep your hydration bladder clean between uses is to store it in the freezer. This freezing hydration bladder method prevents bacteria and mold from growing. Just make sure to empty all the water, roll it up, and place it in a freezer-safe bag. When you’re ready for your next adventure, just rinse it out, and you’ll have fresh water every time.
Quick Routine Tips for Ongoing Maintenance
Regular maintenance helps ensure your hydration bladder stays fresh and ready for your next hike, ride, or run. Here’s how to keep your water reservoir in top shape:
- Rinse After Every Use: Even if you’re only using water, rinsing out your hydration bladder after each use prevents residue buildup and bad tastes.
- Avoid Sugary Beverages: If you use flavored drinks, be sure to clean it thoroughly afterward, as these can lead to quicker mold and bacteria growth.
- Deep Clean Monthly: Regular rinses help, but doing a more thorough hydration bladder cleaning once a month keeps unwanted odors and tastes away.
Bottom Line
Maintaining a clean hydration bladder doesn’t have to be complicated. With a few tools, some DIY cleaning methods, and freezer storage, you’ll have fresh, great-tasting water every time you head outdoors. Following these hydration pack cleaning tips will help prevent mold and bad tastes, so you can focus on the adventure ahead.
